
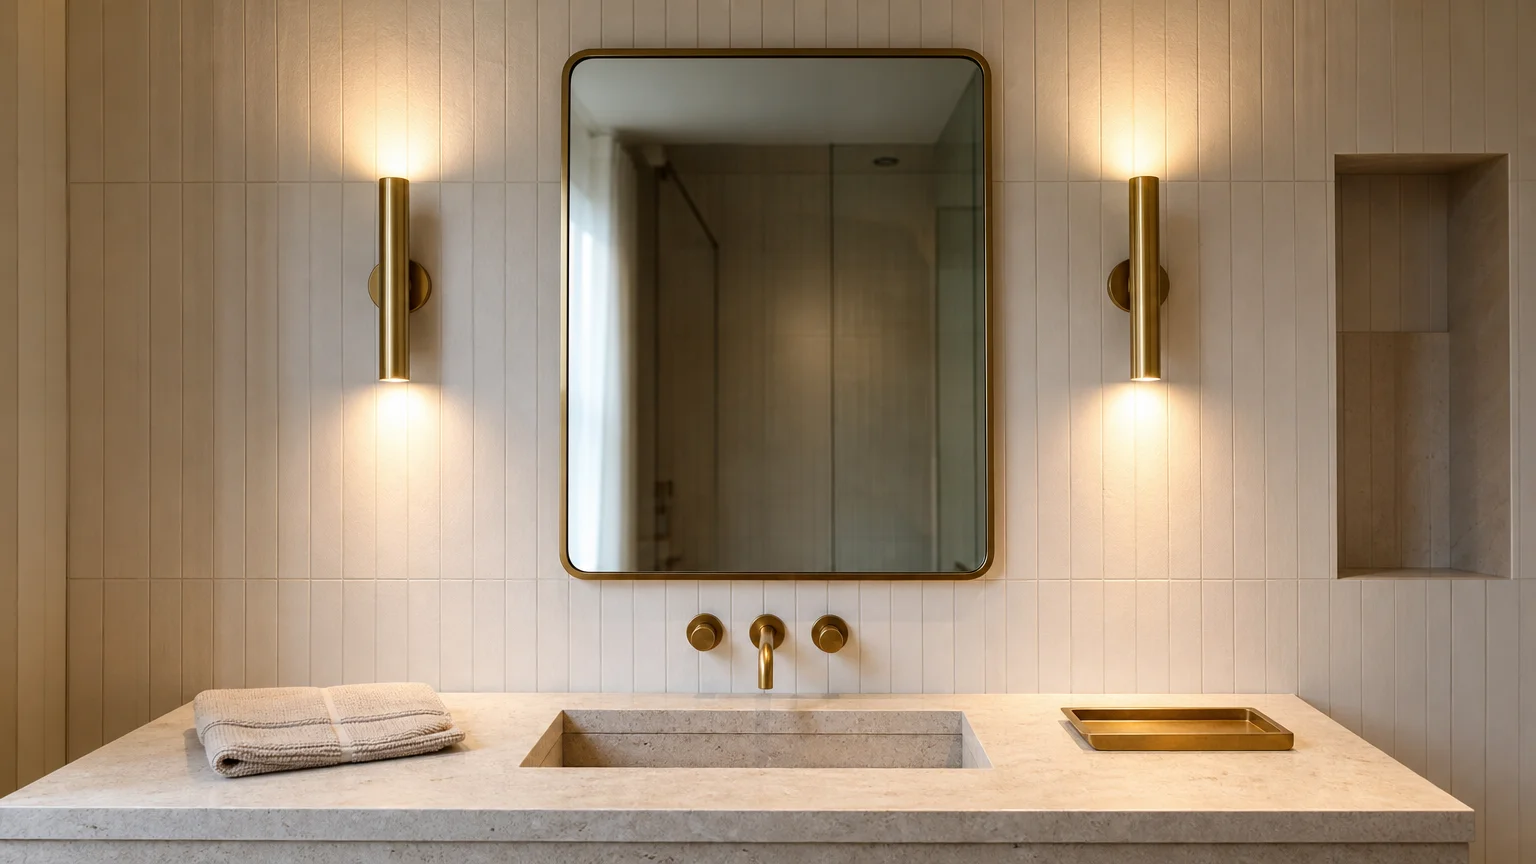
Wall lights are the cheapest way to change how a room feels and the easiest way to get wrong, because the convention that governs them is a single number and the number describes only the centre of the fixture. Height is the easy part. Width, projection and the relationship between the light source and the fitting behind it are where installations go wrong after the wall is closed.
- 01The Rule, and What It Assumes
- 02Centre Height Is Not Body Height
- 03How Wide a Normal Wall Light Really Is
- 04Vanity Lighting and the Three-Quarters Rule
- 05Three Positions Compared
- 06The Electrical Centre and the Back Box
- 07A Five-Minute Test Before the Drill Comes Out
- 08What Belongs in the Specification
01The Rule, and What It Assumes
The convention is that a wall light sits with its centre between roughly 60 and 66 inches above the finished floor, which is about 1,520 to 1,680 mm. It is repeated so often that it is usually presented as a rule. It is better understood as a piece of ergonomics with assumptions attached.
The reasoning behind it is sound. Placing the middle of the fixture near the eye level of a standing adult puts the diffusing element between the eye and the light source rather than putting the bare source in view. A sconce that follows the convention tends to light a room without dazzling anyone standing in it, which is why the number has survived without being written into any standard.
The assumptions are worth stating, because they are where the convention stops being useful. It presumes a reasonably ordinary floor-to-ceiling height, a floor that is actually level, and a person standing rather than sitting or reclining. Change any of those and the number should change with it. A fixture beside a bed is judged from a mattress, not from a doorway. A fixture on a staircase is seen from several heights at once. A fixture in a room with an unusually high or low ceiling sits in a different visual relationship to the architecture even though the ergonomics are unchanged.
There is a second limitation that causes more problems than ceiling height: the convention describes the fixture’s centre and says nothing about its top and bottom edges. Those edges are what collide with the things already on the wall.
02Centre Height Is Not Body Height
Two distinct centres are in play on every wall light, and they are frequently not the same point.
The backplate centre is where the mounting plate sits, and it is usually where the supply connection is made. The light-emitting centre is the middle of whatever actually produces or diffuses the light — the diffuser, the shade, the glass panel. On a compact symmetric fixture the two coincide. On a fixture with a long arm, an asymmetric shade, an uplight and downlight pair, or a decorative element hanging below the light, they can be several centimetres apart.
Field practice has settled on the light-emitting centre as the thing to place at eye level, which means the backplate moves — sometimes well away from where a person instinctively marks the wall. This is the reason the supply position has to be confirmed from the specification drawing rather than estimated on site.
The second number that matters is the body height. In a published catalogue survey, of 63 wall lights with a stated overall width, 61 also stated a body height, and the median body height was about 343 mm, or roughly 13.5 inches. Source type: catalogue figures published by a single manufacturer; they describe the range actually produced and ordered rather than a design rule.
A fixture 343 mm tall, centred at 63 inches, therefore occupies roughly the band from 56 to 70 inches on the wall. The upper edge is the one that meets a mirror frame, a picture rail or a shelf. The lower edge is the one that meets a headboard, a console top or a chair back. Checking the centre alone tells you nothing about either.
The practical rule that follows is simple: work from the specification drawing, place both edges, and only then confirm that the centre still sits where the ergonomics wanted it. Where the two cannot both be satisfied, the furniture usually wins — a fixture that clashes with a headboard looks wrong at every viewing height.
03How Wide a Normal Wall Light Really Is
Width is the dimension buyers most often overestimate, and the catalogue data is a useful corrective. Across the same survey, 63 wall lights with a stated width had a median of 170 mm — a little under seven inches — with the range running from about 80 mm to about 635 mm.
That median surprises almost everyone. Most wall lights are narrow objects, and deliberately so. They are placed at eye level in circulation space, where anything wide intrudes on a mirror, catches a shoulder or dominates a wall that is meant to read as architecture rather than as fittings. Narrow is the norm because it works.
The range is wide for a reason as well: the category spans a small accent piece of 80 mm and a 635 mm decorative panel that functions as a wall artwork with light in it. When a design guide advises choosing a wall light in proportion to the wall, the honest translation is narrower than it sounds: in most rooms the answer lands near the middle of that range, and departing from it should be a decision rather than a default.
| Measurement | Sample | Median | Range |
|---|---|---|---|
| Width or diameter | 63 wall lights | 170 mm (6.7 in) | 80–635 mm (3.1–25 in) |
| Body height | 61 wall lights | 343 mm (13.5 in) | Range not stated |
Projection — how far the fixture stands out from the wall — is the third dimension, and it is the one that decides whether a corridor feels generous or tight. It is stated on a specification sheet far less often than width, which is why it should be requested explicitly rather than inferred from a photograph. A fixture photographed against a plain wall gives no reliable sense of how far a shade or arm extends into the space.
04Vanity Lighting and the Three-Quarters Rule
Over a mirror, the convention changes from a height to a proportion. A horizontal bar light mounted above the mirror is usually specified at about three-quarters of the mirror’s width, which is wide enough to put light on the face at the basin without overhanging the mirror at either end.
| Mirror width | Bar light at about three-quarters |
|---|---|
| 610 mm (24 in) | ~457 mm (18 in) |
| 760 mm (30 in) | ~570 mm (22.5 in) |
| 915 mm (36 in) | ~686 mm (27 in) |
| 1,220 mm (48 in) | ~914 mm (36 in) |
There is a well-established alternative that many designers prefer: a pair of wall lights flanking the mirror, one each side. Light arriving from both sides fills the shadow that a single bar above the mirror casts beneath the brow and under the chin, which is the criticism most often levelled at over-mirror lighting. The same centre-height convention applies to the pair, because the objective is still to put the diffusing element near eye level.
At the median width of 170 mm, a pair of flanking wall lights will not crowd a standard mirror — but the clearance between the mirror edge and the side wall decides whether a pair is possible at all, and that measurement should be taken before the pair is ordered. Where the gap is tight, a narrow fixture with a shallow projection is the answer, and where the mirror is set in a niche the flanking position may not exist. In a wet area, confirm the requirements that apply to that location in the destination market and to the project’s own specification before finalising the fixture.
05Three Positions Compared
The convention barely changes between rooms. What changes is the reference point the height is measured from, and the edge that is most likely to collide.
| Position | Mounting height | Width guidance | What to check |
|---|---|---|---|
| Bedside | Below the standing convention; commonly measured from the top of the mattress so the light falls above the shoulder and onto a book rather than into the eyes | Narrow; at or below the 170 mm median | The lower edge against the headboard; whether the switch is reachable while lying down |
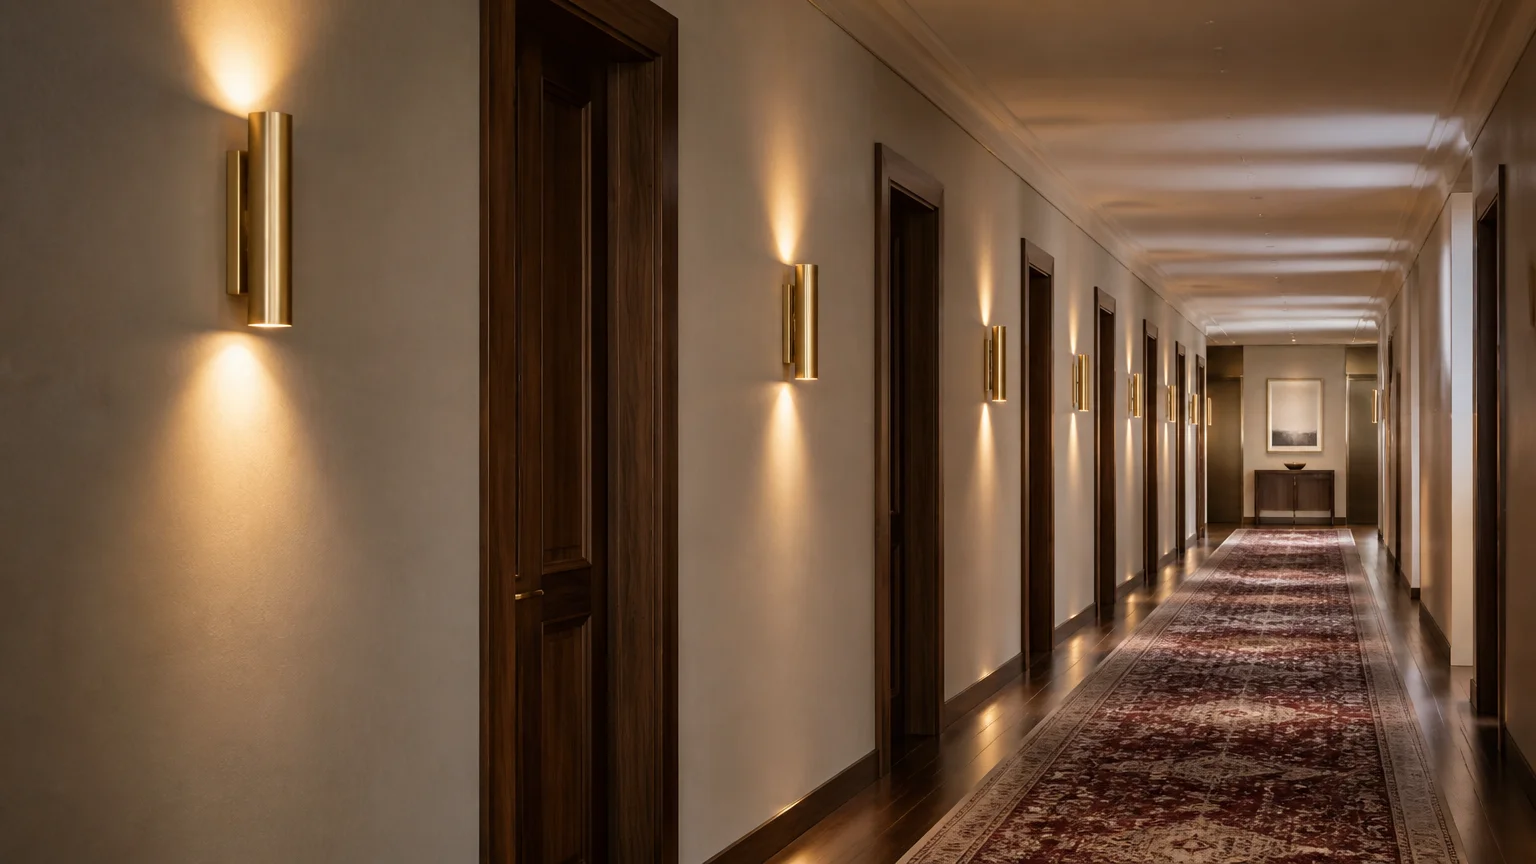
| Corridor or stair | Centre at 1,520–1,680 mm, spaced evenly along the run | Narrow, with shallow projection | How far the fixture projects into a narrow passage; the requirements that apply locally to the escape route |
| Bathroom vanity | Flanking pair at 1,520–1,680 mm, or an over-mirror bar at about three-quarters of the mirror width | Bar at three-quarters of mirror width; pair close to the median | The upper edge against the mirror frame and any shelf above; moisture exposure and the finish specified for it |
Two of the differences are worth pulling out. The bedside case is the only one in the table where the reference point is a piece of furniture rather than the floor, and it is the position where the standing convention must be abandoned rather than adapted. The corridor case is the one where projection matters more than width, because a corridor is judged in section as much as in elevation: a shallow fixture reads as part of the wall, and a deep one reads as an obstruction.
06The Electrical Centre and the Back Box
Wall lights fail at the point where the fixture meets the supply, and almost always for the same avoidable reason: the back box was set from the centre height convention rather than from the fixture’s own drawing.
For a symmetric fixture with a centred backplate, the supply position and the fixture centre are the same point and no harm is done. For anything else — an asymmetric shade, a long arm, a fixture whose light source sits above or below its mounting plate — the two diverge, and the divergence has to be resolved before the wall is closed. Retrofitting an off-centre supply into a finished wall is an expensive way to correct a decision that cost nothing three weeks earlier.
Three checks belong at first fix. Confirm the position of the connection point from the specification drawing and not from a rule of thumb. Confirm the socket or connection is where the fixture’s own electrical arrangement expects it, particularly where the fitting is supplied with a short lead. And confirm that mounting anchors land in material that can take the load, since a wall light is a lever as well as a weight and its fixing is doing more work than the mass of the fixture suggests. Where a fixture is heavy, or mounted high, or fixed to a lightweight partition, the anchor and the substrate should be confirmed by the structural or electrical professional responsible for the installation, against the conditions on site and the requirements that apply locally.
07A Five-Minute Test Before the Drill Comes Out
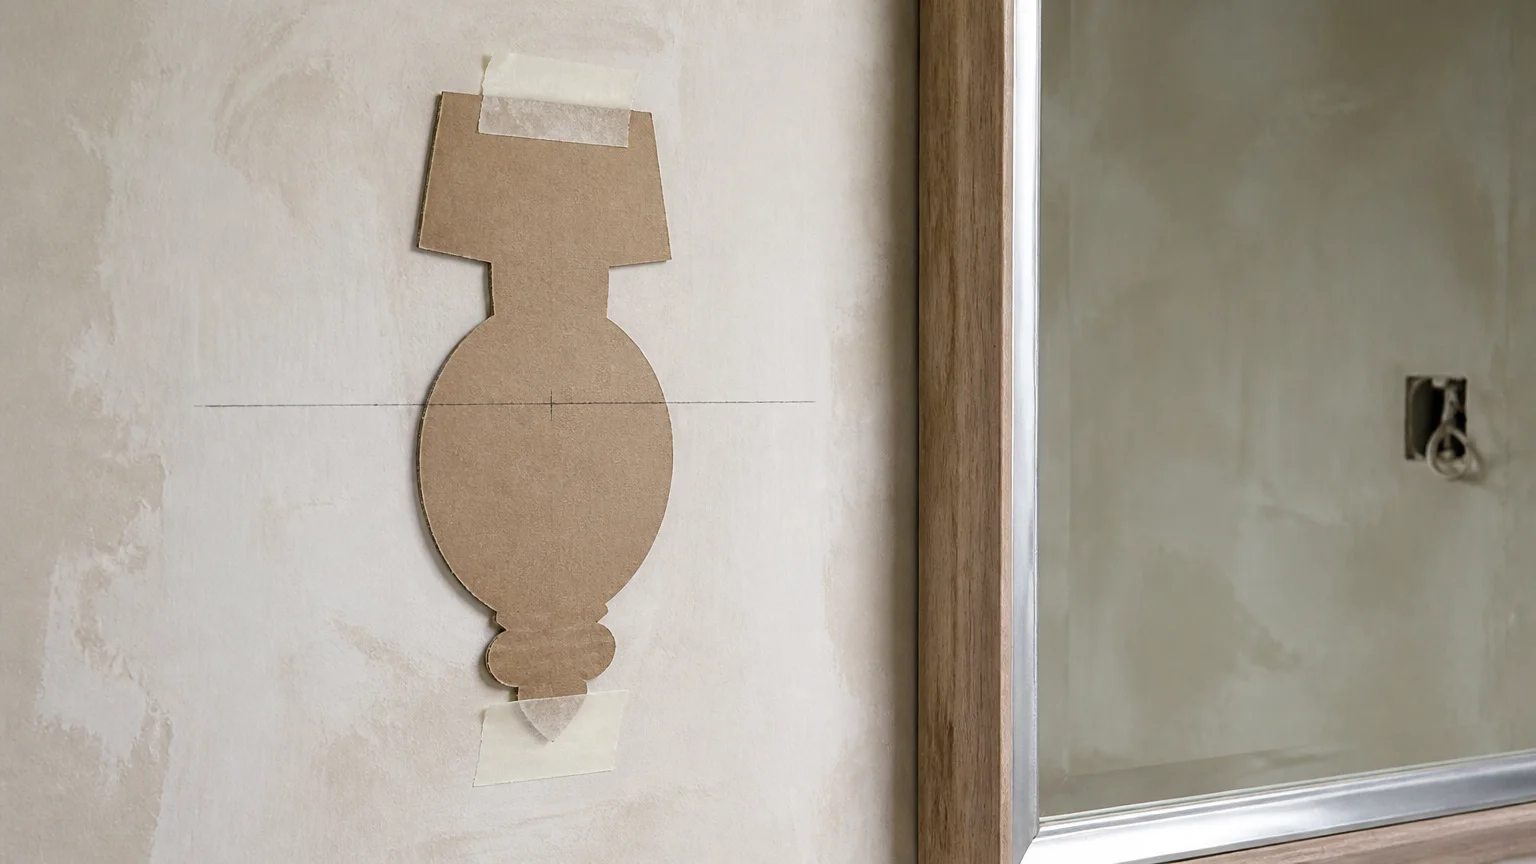
The cheapest quality control available on a wall light installation costs a sheet of cardboard and five minutes, and it catches most of the problems in this article.
Cut a template to the fixture’s true width and true body height — the specification figures, not the ones from the photograph. Tape it to the wall at the intended centre position. Then stand where the fixture will be used: at the basin, at the pillow, at the foot of the stairs. Look at it from a seated position too, not only from standing. Mark the light-emitting centre on the template and compare it with the supply position already in the wall, and mark the top and bottom edges and check them against the mirror frame, headboard, console or shelf.
Five minutes of that will show up a fixture that clashes with a headboard, a pair that crowds a mirror, a bar light that overhangs, or a supply point that has been set in the wrong place. The convention is a starting point; the wall has the final say, and the template is how you ask it.
08What Belongs in the Specification
Wall lights are bought in multiples, and a small specification gap is therefore multiplied by every installation position in the building. A complete line in the schedule includes the following, and writing it out is quicker than resolving a discrepancy later.
- Mounting height and reference point. State the height and state what it is measured from — the finished floor, or the top of the mattress where that is the governing reference.
- Overall dimensions. Width, body height and projection, taken from the specification drawing rather than a rendering.
- Backplate and fixing. Backplate size, fixing centres and the position of the connection point relative to the backplate.
- Light source and colour temperature. Write the colour temperature rather than the phrase “warm white”, and note whether colour rendering quality matters for the surfaces nearby.
- Control. Whether the fixture is switched locally, switched at the door, or dimmed, and whether it needs a switch on the fitting itself.
- Finish and consistency. Base metal, finishing method, target finish, and the acceptable range of variation across a batch, with a signed reference sample retained where appearance matters.
- Maintenance access. Whether the light source and driver can be reached and replaced without dismantling the fixture, which decides the long-term operating cost of every one of them.
Two of those items carry more weight than their length suggests. Colour temperature is the one most often left as a phrase, and it is the one that produces the most visible inconsistency when different batches or suppliers interpret “warm” differently. Finish consistency is the other, because a repeated fixture is judged as a group: a row of thirty wall lights along a corridor is compared side by side in a way that a single fixture in a room never is. Specifying the base metal, the finishing method, the approved sample and an acceptance range for variation is how a corridor ends up looking like one installation rather than thirty.
Read as a whole, the numbers in this article are modest: a centre height, a body height, a median width, a proportion for a mirror, and a position for a connection point. Together they are the difference between a wall light that reads as part of the architecture and one that reads as an object that was fitted to a wall.
Frequently Asked Questions
What height should a wall light be mounted at?
The common convention is a centre between 1,520 and 1,680 mm above the finished floor, roughly 60 to 66 inches, which places the diffusing element near the eye level of a standing adult. It is an ergonomic convention rather than a rule, and it assumes an ordinary ceiling height and a level floor. Where the fixture is judged from a mattress or from a staircase, adjust the reference point rather than the principle.
Is the centre of the backplate the same as the centre of the light?
Not always, and on asymmetric or articulated fixtures it is frequently quite different. The light-emitting centre is the point to place at the intended viewing height, and the backplate follows from the fixture’s own geometry. Check the specification drawing for both, and note that the position of the supply connection has to be derived from the drawing rather than from the height convention.
How wide should a wall light be?
Narrower than most buyers expect. In a published survey of 63 wall lights, the median width was 170 mm, a little under seven inches, with the range running from about 80 mm to about 635 mm. Most wall lights are deliberately slim because they sit at eye level in circulation space; the wide end of the range consists of pieces that function as wall decoration.
How wide should a mirror light be?
About three-quarters of the mirror width is the usual convention for a bar light mounted above the mirror — roughly 570 mm for a 760 mm mirror. A pair of wall lights flanking the mirror is a well-established alternative and tends to give better modelling of the face, but only where there is enough clearance between the mirror edge and the side wall to fit them.
Can I use one wall light beside a mirror instead of a pair?
It is done, but a single side light leaves one side of the face shadowed, which is exactly the problem the flanking pair exists to solve. Where only one side is available, a wider diffusing fixture, or a bar light above the mirror, produces a more even result than a single narrow sconce placed on one side.
What should I check before the wall is closed?
The position of the connection point relative to the backplate, taken from the specification drawing; the size and fixing centres of the backplate; and whether the substrate can carry the fixture as a lever rather than merely as a weight. Confirm the structural and electrical details with the professional responsible for the installation, against the conditions on site and the requirements that apply locally.
Specifying Wall Lights Across a Whole Building?
Send us the wall elevations, the mirror or headboard dimensions the fixtures have to work with, the quantities by room type and the destination market. We will work through mounting heights, body heights and projections position by position, flag where the upper or lower edge becomes the binding constraint, and set out the finish and colour-temperature detail that keeps a repeated fixture reading as one installation. Our specification guide for hotel wall sconces covers the project-level view across guest rooms, corridors and public areas, and our corridor lighting design guide deals with the repeated run in detail.
For reading positions specifically, the procurement guide for hotel wall reading lights and the bedside reading light specification take the bedside case further, including the switch and glare questions that matter once the light is being used rather than specified. To talk through a set of wall elevations, our project team can review a fixture schedule against the rooms it has to serve.


